Sunday, March 11, 2012

I have been such a wayward blogger this past month, and it hasn't been because I haven't been baking, I have...I swear!   The past few months have been really busy with a charity that I volunteer with.  The Red Wagon Ministry provides diapers and wipes to families in need in the Shenandoah Valley.  It is a really great cause, one that is near and dear to my heart as the need in our area is so great for so many.  Yesterday, we hosted our largest fundraiser of the year, A Cupcake Challenge!  Basically, bakers bring in cupcakes for an audience and the cupcakes are judged.  Winners are announced, cupcakes are eaten and enjoyed, and everyone has a great time!  


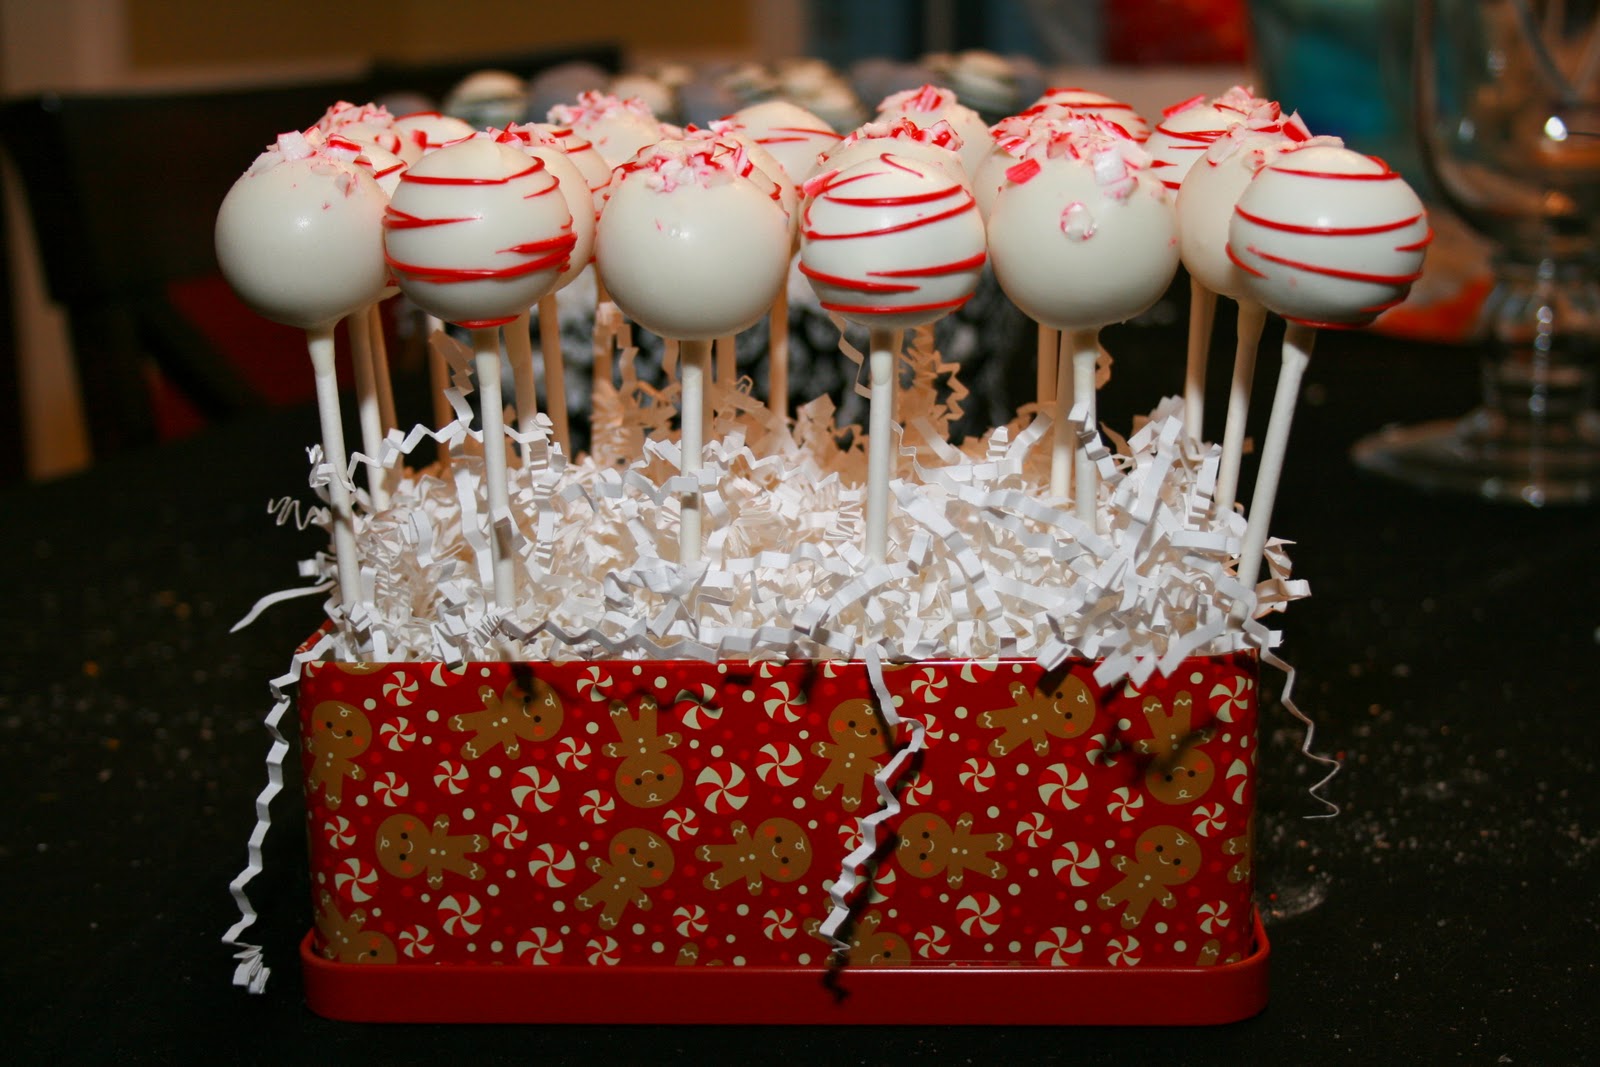
I didn't bake cupcakes this year.  Last year I baked lemon chiffon cupcakes (and came in second to an amazing local baker) but felt that this year, since I was so involved with the charity that it would be a conflict to compete as well.  So instead I made these.


Our fearless leader wanted something small to thank the judges, bakers, volunteers, and emcee.  To make this cookie I used a car shaped cookie cutter then trimmed it down to the shape that I wanted.  This was my first attempt at trimming a cookie and I learned a lot.  This was also my first attempt at making the topper for the bag.  The toppers are easy to make and it gives the cookie a nice finish without being too fussy.  


So the event is over now, and it was a huge success and I'm on to 2 more events.  My husband's birthday is coming up and I'm going to do a mexican theme- "Nacho Ordinary Birthday Party."  And shortly after that will be my children's birthdays.  My oldest wants a soldier themed birthday party.  Party City, here I come!

Saturday, January 14, 2012

Pink Snowflakes

A friend of mine was planning a party for her daughter's birthday this weekend.  The theme: pink snowflakes.  The challenge: pink snowflake cookies to give out as favors.  I've been wanting to try something new with my cookies.  Instead of icing the cookie pink and then adding the white detail, I decided to try actually coloring my cookie dough and then adding the detail.  I wasn't sure how it would come out, but they actually turned out really cute.  I basically colored the dough the way you would color fondant, adding the color, then kneading the dough until it was the color I wanted, but I think you could probably add your color to the dough in your mixer to skip this step.  Once the cookies were baked and cooled, I added the frosting detail and the sanding sugar.  I think the cookies are absolutely beautiful. 


Happy Birthday Cassia!

Thursday, January 5, 2012

Going Bananas!

So many of you have asked me how I create these cake pops, so I decided to show everyone step-by-step how I made my latest creations.  I do have to credit Bakerella for the inspiration.  See if you can guess what they are...


The first thing you have to do is make the cake balls and put them on the sticks.  This customer wanted strawberry cake.


Dip the sticks in the chocolate and while the chocolate is still wet, add eyes and ears.  I used peanut butter chips for the eyes that I inserted with the pointed side in, and peach colored jumbo chip sprinkles for the ears.


To give the eyes definition, I added a white confetti sprinkle to the peanut butter chip using a dab of chocolate.


Then I used black chocolate to add more detail to the eyes.  Can you tell what it is yet?


I attached a large peanut butter chip using chocolate and used the black chocolate to add a nose and draw on a mouth with a toothpick.


And voila!  Monkeys!  Its that easy folks!

Sunday, January 1, 2012

Sweets for Daisies

A few weeks ago, my friend and mentor, Becky of Beckaboo's cakes, had to leave town unexpectedly due to a family emergency.  Unfortunately, she had an order that needed to be done and delivered while she was gone so she asked if I might be able to do it for her.  After some rearranging, and a lot of help from my dear husband, I got it finished.  


The customer's daughter's Daisy troop was getting their pins and she wanted 30 pops, 12 of them daisies.  I wasn't really sure how to do them, and Becky suggested using a cookie cutter to cut out the daisy shapes then piping on the yellow centers.  Sounds easy enough, right?  


WRONG!  It was actually much more difficult than I thought it would be!  The first few that I made I rolled out too thin, so they literally bent in half when I put the stick in.  I managed to get 12 on sticks, but dipping them was much harder than dipping a ball.  I was terrified I would lose one in the chocolate, that it would bend in half when I was shaking off the excess chocolate.  Fortunately, they didn't but I lost a lot of the shape when the chocolate dried, so I piped on the petals before I piped on the centers.  


Here are the pictures:


I would like to do more of these, I definitely need the practice.  All in all, though, I do think they turned out cute and the arrangement was really cute when it was done.  By the way, I finally figured out how to make my pictures larger.  Enjoy!

Happy New Year!

As promised, here are the pictures of the basket I did for the new year.  I tried to make silver cake pops with luster dust, but they didn't turn out as shiny as I would have liked.  I've watched them use luster dust on all the cake shows I watch, but it never works for me the way it does for them.  Clearly, I need more practice, but the arrangement turned out pretty cute either way.


Here is a close-up of the pops, you can really see the sparkles on the silver pops.


These would be cute for a zebra party mixed in with some pink pops too!


And just as a bonus, I've included a picture of another Christmas arrangement I did.


2011 brought many blessings to my family, and I welcome 2012 with open arms.  Thank you all for your support as I started this new adventure.  Happy New Year to all of you out there in cyberspace, all the best to you and yours!

Thursday, December 29, 2011

Merry Christmas!

Just before I left to go out of town I made the most adorable Christmas-themed cake pops.  I made them the evening before we left town and the pictures have been trapped on my laptop for a week, just waiting to be posted in cyberspace.  The order was simple, 30 cake pops, Christmas themed, arranged.  I found the most adorable little box at Hobby Lobby (aka, my new favorite place to spend my money!) on sale for 60 percent off, scoured the internet for some ideas and voila!  A Christmas basket was born.  Here are the pictures of the arrangement followed by the individual pops.  LOVE!


I'll be working on a New Year's basket tomorrow, so stay tuned for those pictures.  I will be trying something new with them-wish me luck!  Merry Christmas!

Saturday, December 17, 2011

Cake Pops and Christmas

This has been a crazy couple of weeks; seems everyone is giving cake pops for Christmas this year.  This week alone I made 184 cake pops.  Nothing as spectacular as the penguins from last week, but still cute.  Here are the pictures.